
How to Choose Outdoor Railings for Concrete Steps
You stand at the bottom of damp concrete steps with a tape measure in one hand and chalk in the other, staring at the edge where the first anchor might go. The landing is still wet from last night’s rain. One bad mark here, and the whole rail will sit crooked.
That moment tells you what choosing outdoor railings for concrete steps really is: not a décor decision first, but a safety, fit, and durability decision. Concrete gives you less forgiveness than wood. The stair geometry is fixed, the edge distance is limited, and weather will test every fastener and finish you choose.
Introduction: Start With Safety, Fit, and Weather
Why concrete steps need a different railing approach
Concrete stairs ask more from a railing than many homeowners expect. You are not just attaching metal to a convenient surface. You are drilling into a hard, sometimes aging material that may have hairline cracks, chipped noses, patch repairs, or years of freeze-thaw wear. A three-step porch in Albany and a five-step entry near the Jersey Shore may both look simple, yet each presents different anchoring challenges because water, salt, and temperature swings attack concrete differently.
That is why the early decision should center on function. Coral Cast’s precast concrete balustrade systems, handrails, balusters, and related architectural precast components are designed to bring safety, durability, and architectural continuity to concrete steps, porches, and entryways. On concrete, the wrong fit shows up fast.
What a good outdoor railing should solve on day one
A good railing should do four things immediately. It should give you a steady grip in rain. It should follow the stairs without awkward breaks. It should mount where the concrete can actually hold anchors. And it should leave enough walking space that nobody clips a toe or shoulder passing by.
Think about a common front entry: four steps, a 36-inch landing, one side open, one side near a wall. Your railing should support the full trip from bottom step to top landing, not just occupy space near the middle. If you start with looks alone, you can end up with a handsome rail that feels wrong every single day.
Start with safety and fit; style comes after the railing solves the stairs.
Prerequisites and Tools: Measure Before You Buy
Measure the stair rise, run, and landing space
Before you browse finishes, record the stair geometry. Measure the total rise, the number of risers, the depth of each tread, the total horizontal run, the landing depth at the top, and the clear space from proposed base plates to the stair edge. On concrete steps, that last measurement matters a lot. A base plate that looks fine on paper can end up too close to a chipped edge in the field.
| What to Measure | What to Record | Why It Matters |
|---|---|---|
| Total rise | Ground to top landing | Helps confirm overall rail slope and compatibility |
| Step count | Number of risers and treads | Determines whether a fixed or custom rail will fit |
| Tread depth | Front edge to riser face | Affects base plate placement and foot room |
| Landing space | Depth and width at top | Shows whether the rail can start or return cleanly |
| Edge distance | Base plate to concrete edge | Protects against weak anchoring and breakout |
Gather the tools, anchors, and safety gear
Coral Cast provides installation guidance through manuals and resources, and proper planning always helps, but a guide does not replace basic field tools. For concrete installs, standard gear usually includes a tape measure, a level, a hammer drill, masonry drill bits, a wrench or socket set, concrete anchors, and protective gear. Add chalk, a straightedge, work gloves, eye protection, hearing protection, and a shop vacuum or brush for clearing drilled holes.
- Tape measure and pencil or chalk
- 2-foot or 4-foot level
- Hammer drill with masonry bit sized to the anchor
- Wrench or socket set for tightening hardware
- Concrete anchors matched to the base material
- Brush or vacuum to clean anchor holes
- Safety glasses, gloves, and hearing protection
If you do not already own a hammer drill, or if the steps show obvious damage, budget for professional help instead of improvising. A neat-looking base plate over weak concrete is still a weak install.
If you do not know the rise, run, and available edge distance, do not buy yet.
Step 1: Inspect the Concrete and Map the Stair Geometry
Check for cracks, spalling, and weak edges
Start with the slab itself. Look for cracks running through the tread, flaking surfaces, exposed aggregate, loose patch material, or stair noses that have broken away. Spalling around the front edge is common after winters in places like Buffalo, where salt and freeze-thaw cycles do real damage. You are looking for sound, dense concrete where anchors can bear load without blowing out an edge.
- Hairline surface cracks may be manageable, but wide or moving cracks deserve a closer look.
- Broken edges reduce safe anchor placement options.
- Old patch repairs can drill differently than the surrounding concrete.
- Rust stains may hint at hidden steel or moisture issues.
Mark the rise, run, and handrail start and end points
Once the concrete passes inspection, map the rail path. Mark the bottom start point, the top termination point, and the proposed location of each base plate. Use a level and straightedge so you are not eyeballing a slope that ends up fighting the stairs. Coral Cast offers handrails and related architectural precast components in coordinated design options, which is exactly why measurement has to happen before selection, not after fabrication.
- Mark the outside walking line of the stair.
- Set the rail offset so hands clear walls, columns, or trim.
- Check each proposed anchor location for edge distance.
- Verify the rail will feel continuous from first step to landing.
On a narrow stoop, an inch or two can be the difference between a clean fit and a base plate that crowds the tread. Measure twice. Then look again.
A railing is only as strong as the concrete it mounts to.
Step 2: Match the Railing to the People Who Will Use It
Choose a height and grip that feel natural on the stairs

You want a railing that people reach for without thinking. That means the grip should feel natural in the hand, not bulky, sharp, or oddly shaped. It should also track the stair line smoothly so your hand does not lose contact halfway up. Local codes vary, so verify the required height, clearance, and graspability in your jurisdiction before you order. If the stairs are elevated, you may also need a guard in addition to a handrail.
A simple example helps. A healthy 35-year-old carrying groceries can tolerate a mediocre grip for a while. An 82-year-old parent with arthritis cannot. Choose for the most vulnerable daily user, not the easiest one.
Plan for children, seniors, visitors, and high-traffic access
Coral Cast’s balustrade systems and handrail components are well suited to support families, guests, and seniors moving around every day. That is the right lens. Ask who uses the stairs in bad weather, at night, while carrying packages, or with limited balance. A rental property in Queens, a church side entry, or a duplex with frequent deliveries all call for a more forgiving, more intuitive rail than a rarely used garden step.
If several people use the stairs often, you may need rails on both sides or a profile that stays comfortable for a wide range of hand sizes. On a five-foot-wide front stair, one decorative rail on the open side may look balanced from the street yet still feel incomplete in daily use.
If the frequent user feels uneasy on the stairs, the railing choice is wrong.
Step 3: Choose the Material and Finish for Outdoor Exposure
Compare precast concrete and other outdoor-friendly materials
Material choice is where many buyers drift into style-first thinking. Pull it back. Outdoors, the rail has to survive rain, sun, dirt, temperature swings, and whatever people drag onto the steps from the driveway. Coral Cast’s architectural precast concrete components are built for durability and exterior use, and precast remains a strong answer for many concrete-step projects because it is rigid, visually cohesive, and designed for architectural integration.
| Material | Where It Works Well | Strengths | Watch-Outs |
|---|---|---|---|
| Precast concrete | Most residential stoops and porch steps | Durable, architectural, cohesive with masonry | Requires proper design, fabrication, and installation planning |
| Stone veneer with matching architectural elements | Projects with coordinated facades | Strong visual continuity, traditional appearance | Needs thoughtful detailing and compatible support |
| Metal accents or mixed materials | Selective architectural settings | Can add contrast and definition | Must be integrated carefully with the overall design |
| Wood or composite | Rare decorative applications | Warm appearance | More maintenance, less common for direct concrete-step installs |
Select a finish that can handle rain, sun, and temperature swings
Finish failure usually shows up before structural failure. That is why a rail can still feel “solid” while looking tired. Outdoor railings fail visually when the finish wears, dulls, or stains at edges and joints. If you are near salt air on Long Island or dealing with repeated freeze-thaw in Rochester, inspect the finish specs with more skepticism. Matte and lightly textured finishes remain popular for a reason — they disappear nicely against concrete and brick — but only if they are meant for exterior exposure.
Coral Cast offers multiple finish options, including coral/travertine, smooth/limestone, and acid wash, which helps match the project to the surrounding architecture. Narrow your list to finishes you are willing to maintain. A coating or surface treatment that needs constant touch-up may not be worth the trouble on a front entry you cross twice a day, every day.
Outdoor railings fail visually when the finish wears before the structure does.
Step 4: Decide How the Railing Will Anchor Into Concrete
Decide between surface-mount and integrated placement
This is where many attractive ideas die, and that is fine. Better on paper than after fabrication. Surface-mount rails fasten to the tread or landing surface. Integrated or side-supported details may connect with adjacent architectural concrete elements. Either can work, but the right choice depends on tread depth, edge condition, walking clearance, and how the load will travel into the concrete.
| Mount Type | Best When | Advantages | Watch-Outs |
|---|---|---|---|
| Surface-mount | You have enough tread or landing area for base plates | Common, easier layout, widely supported by fabrication details | Can crowd narrow steps or land too close to edges |
| Side-mount or integrated support | You need to preserve walking width on the tread | Cleaner tread surface, less foot interference | Requires sound vertical concrete and careful alignment |
A clean integrated detail on a broad stoop can look excellent. So can a simple surface-mount on a compact four-step entry. The decision is not about which looks fancier. It is about which gives you solid anchoring without creating a daily nuisance.
Confirm the anchor layout before drilling into the concrete
Coral Cast provides product fabrication, manufacturing, and installation guidance resources, and many projects benefit from that support. Still, the hardware layout has to match the concrete conditions on your site. Concrete railing installs typically rely on masonry anchors or similar fastening hardware sized for the base material and the rail base plate. Dry-fit everything first. Place the rail, check plumb and slope, mark each hole, and confirm you are not drilling into a weak corner, a failed patch, or a location that leaves too little edge distance.
- Set the rail in place and verify alignment with the stair line.
- Mark every hole before drilling even one.
- Double-check edge distance and tread clearance.
- Clean drilled holes thoroughly before setting anchors.
Secure anchoring is what turns “built to last” from a design goal into a real outdoor result. Skip that part, and even a good rail will wobble or loosen.
The cleanest layout is the one you can anchor solidly, not the one that looks simplest on paper.
Step 5: Compare Styles and Finalize the Spec for Outdoor Railings for Concrete Steps
Match the railing profile to the building style
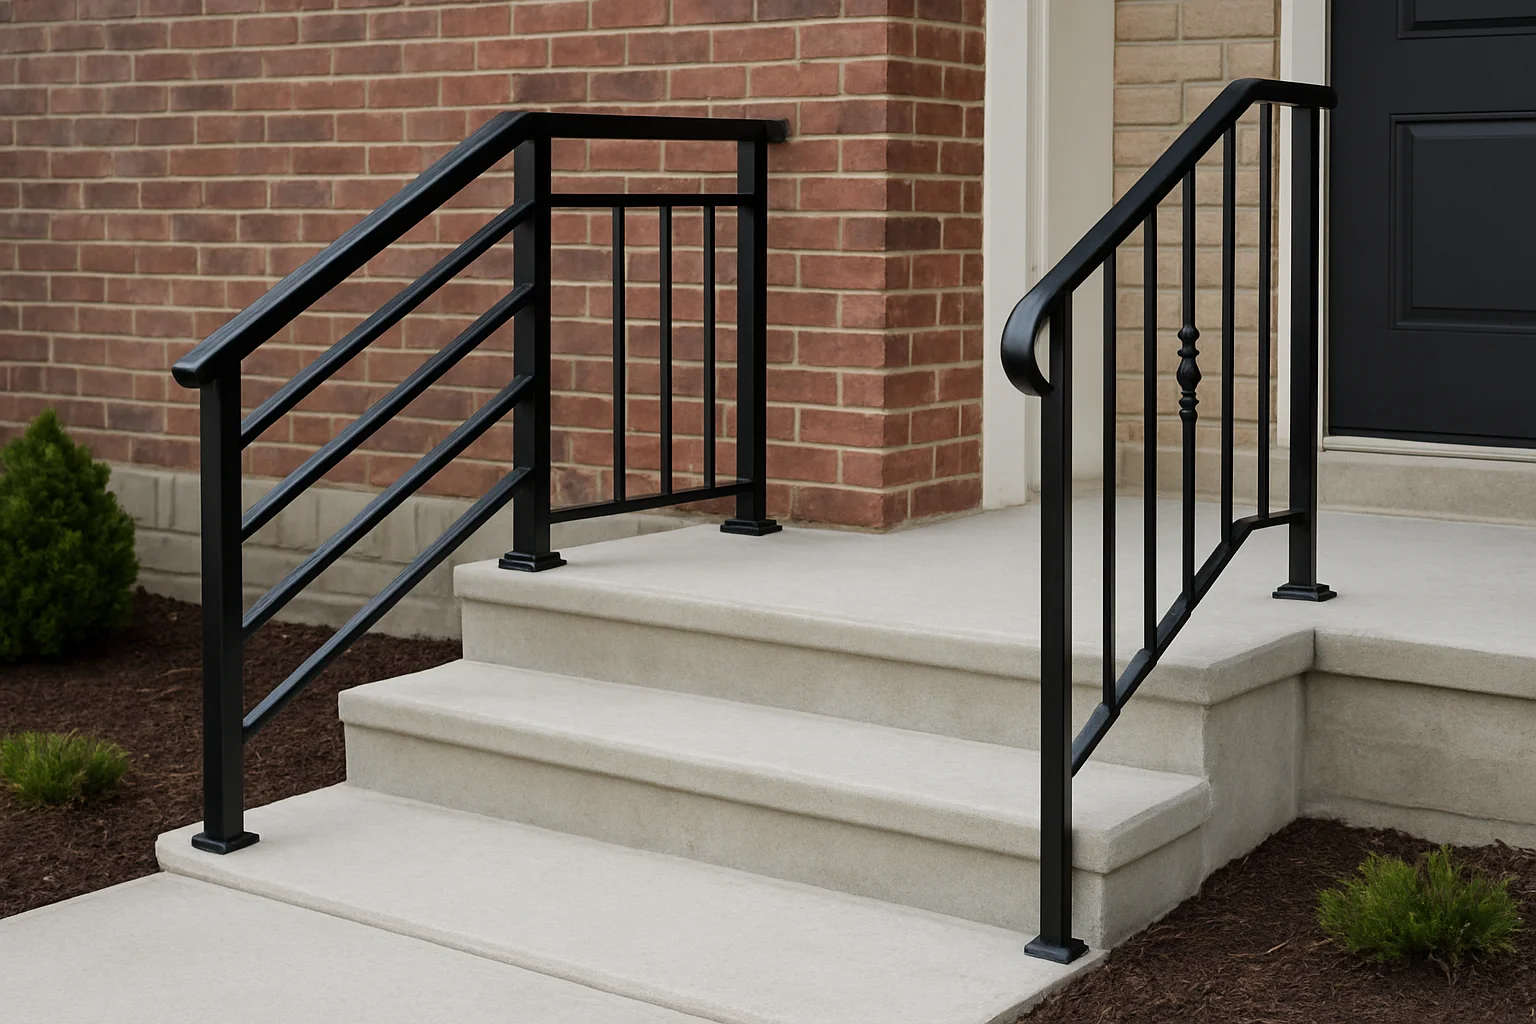
Now style gets its turn. A top-ranking inspiration result on this topic leans heavily on porch handrails, black stair railing, and 4 step handrail ideas. That makes sense. Most people want a rail that looks intentional from the street. The trick is to let the architecture set the direction. A plain suburban entry often benefits from a restrained profile. A more formal masonry facade may support a slightly more decorative pattern or return.
If the stair ties into heavier architectural pieces — coping, thin veneer, stone moldings, columns, pavers, pier caps, wall caps, decorative stone, or a balustrade system — keep the rail visually disciplined. On projects where precast details already carry the visual weight, a quieter handrail usually reads better. If those surrounding elements come from Coral Cast or a similar architectural precast manufacturer, let the stonework lead and the handrail support it.
Confirm sizes, colors, and step count one last time
This final check saves returns. Coral Cast offers a wide range of architectural precast products and coordinated design options, which is helpful only if you verify the basics one last time. Confirm the actual number of steps, the hand of the stair, the needed rail length, the mounting type, the finish, and the included hardware. If the specification is custom, verify the dimensions against your measured geometry rather than assuming it will stretch to fit.
- Step count matches the product range
- Mount type matches your concrete layout
- Color and sheen fit the entry materials
- Base plates clear edges and walking paths
- Hardware is appropriate for concrete, not just included
- Any touch-up needs are realistic for your climate
Good design should look intentional from the sidewalk and invisible in daily use.
Common Mistakes
Buying before measuring or inspecting the concrete
The fastest way to waste money is to order first and measure after. It happens all the time with online kits, especially when a listing photo looks close enough to your own stairs. A “4-step” product may not fit your rise, tread depth, or landing condition. And if the concrete edge is already spalled, no amount of wishful thinking will turn it into a reliable anchor zone.
When people regret a railing purchase, the problem is often not the rail itself. It is the mismatch between a generic solution and a very specific stair.
Ignoring weather exposure, step count, or user comfort
Coral Cast frames outdoor concrete solutions as something that should feel reliable every time you go in or out, including in rain. That is the standard. Do not ignore exposure just because the steps are small. Sun, standing water, snow, and de-icing salt will all shorten the life of a weak finish. Coral Cast also supports custom architectural design fabrication, which helps avoid the common error of choosing without confirming the actual stair layout.
And do not overlook feel. A rail that is too far from the natural hand path, too awkward to grip, or too short to support the whole climb will annoy you long before it fails.
Do not let a good-looking railing distract you from a weak slab or a bad measurement.
Conclusion
Hold to the basics
Measure first, match the users, and the railing choice stops feeling like a gamble.
Give the site one last look
The right outdoor railings for concrete steps fit the geometry, mount securely, survive weather, and feel steady every day.
Before you order, what deserves one more look at your site — the concrete itself, the anchor layout, or the people who use those steps most?
Refine Your Entry With Coral Cast
Coral Cast’s architectural precast concrete manufacturing gives homeowners, builders, architects, contractors, and property owners properly cured, maintenance-free stone products shipped nationwide with free estimates.