

Columns That Command Attention: Precast Styles from Classical to Modern
At sunrise, a crew centers a tall column between two porch footings while the architect checks the line from the curb and the builder marks the final plumb point. Nobody talks much. They do not need to. If that shaft lands even slightly wrong, the whole entry feels wrong before the day is over.
That is the reality of Concrete Columns on any serious project: they have to read cleanly from the street and, in many cases, perform real structural work. A Doric porch on a Colonial Revival house asks for one kind of discipline. A smooth square column under a retail canopy asks for another. The material can handle both, but only if you make decisions in the right order.
Precast gives you consistency because the components are cast in a controlled environment before they ever reach the jobsite. That helps with profile, finish, and repeatability. It does not rescue bad layout, undersized footings, or style choices that fight the building. If you want a column that looks inevitable rather than added on, start with structure, move through proportion, and finish with careful installation.
Prerequisites: Verify load, style, and site conditions
Before you compare flutes, capitals, or surface textures, settle the conditions that cannot be negotiated away. This is where most successful column work starts — and where many bad orders begin.
Confirm whether the column carries load or only provides visual support
First, decide what the column is actually doing. Precast concrete columns can serve as load-bearing elements, or they can act purely as decorative architectural features around another support or at a facade edge. Those are very different assignments.
If the column carries a beam, porch roof, canopy, or upper balcony, treat it as structure from the first sketch. On a renovation in Westchester, for example, an owner may want to replace a skinny steel lally column with a classical round shaft. Fine — but the new piece cannot be sized by appearance alone. Load-bearing columns should be reviewed by an engineer before fabrication or installation.
If the column carries load, design from the structure outward—not from the finish inward.
Check existing footing size, ceiling height, and attachment points
Next, walk the site with a tape, a level, and the drawings. Verify the footing footprint, bearing area, slab condition, ceiling or beam height, and the exact location of any top and bottom attachments. Existing porches are full of surprises. We routinely find off-center footings, patched slabs, or framing that drifted over time.
| Item to Verify | What You Need to Confirm | Why It Matters |
|---|---|---|
| Footing | Size, location, elevation, bearing condition | Determines support and column centerline |
| Overhead condition | Beam depth, soffit level, attachment method | Controls overall height and top connection |
| Base area | Flatness, finish floor, drainage path | Affects seating, shim plan, and appearance |
| Adjacent elements | Railings, steps, doors, trim, lighting | Prevents crowding and awkward conflicts |
Even a handsome shaft will look clumsy if the base crowds a stair run or the capital crashes into a soffit vent. Confirm it now, not after delivery.
Gather permits, engineering input, and product specifications before ordering
Precast pieces arrive with real weight, real dimensions, and very little tolerance for guessing. Get the permit path clear, gather any required engineering, and review the product data before you place the order. That includes shop drawings, section details, connection requirements, finish information, and lifting considerations.
- Architectural drawings or a field sketch with dimensions
- Structural review for any load-bearing condition
- Footing and attachment details
- Manufacturer specifications, finish notes, and handling requirements
- Delivery access plan and installation sequence
On new residential work, this may be simple. On a mixed-use storefront in Brooklyn, permit review and sidewalk access can shape the whole installation plan. Get the paperwork and the physical constraints aligned early.
Step 1: Define the architectural style and column profile
A column should look like it belongs to the building that surrounds it. That sounds obvious, but many projects miss here by mixing a decorative vocabulary that the facade cannot support.
Use classical orders only when the facade can support them
Classical references still work because they bring a familiar order to an elevation. Doric, Ionic, and Corinthian each carry different proportions and detailing cues. Doric reads sturdy and restrained. Ionic introduces scrollwork and a more refined profile. Corinthian brings the most ornament and asks for a facade with enough presence to carry it.
Do not bolt a highly ornate capital onto a plain ranch entry and expect harmony. A classical order works best where rooflines, entablatures, window spacing, and trim depth already support that language. Think Greek Revival, formal civic entries, or symmetrical custom homes — not every front porch in Nassau County.
A column should reinforce the building’s rhythm, not compete with it.
Decide between round, square, fluted, or smooth profiles
Once you choose the design language, choose the shaft profile. Round fluted columns create shadow and movement; they suit traditional homes, club entrances, and formal walkways. Round smooth shafts feel quieter. Square columns can bridge traditional and modern work depending on their base and capital treatment. A crisp square profile with minimal reveals often fits contemporary facades better than anything with heavy ornament.
| Style Direction | Typical Profile | Best Fit |
|---|---|---|
| Classical | Round, often fluted, defined base and capital | Formal porches, civic entries, symmetrical facades |
| Transitional | Round or square, smooth shaft, simplified trim | Custom homes, mixed-material exteriors |
| Modern | Square or round, smooth, minimal ornament | Storefronts, clean-lined residences, canopies |
Set proportions to match the porch, entry, or storefront opening
Good proportion is what makes the column feel natural. Compare the shaft width and overall height to nearby openings, rooflines, beam depths, and facade spacing. On a deep porch with wide bays, slightly heavier columns can steady the composition. On a narrow front entry, a thick shaft may make the house feel pinched.
Also watch rhythm. If you have three equal openings, the columns should help establish that spacing rather than break it. This is where we often coordinate columns with balustrade, coping, stone moldings, pavers, or pier caps so the entire frontage reads as one family of parts rather than a collection of catalog items.
Step 2: Select the right precast Concrete Columns type
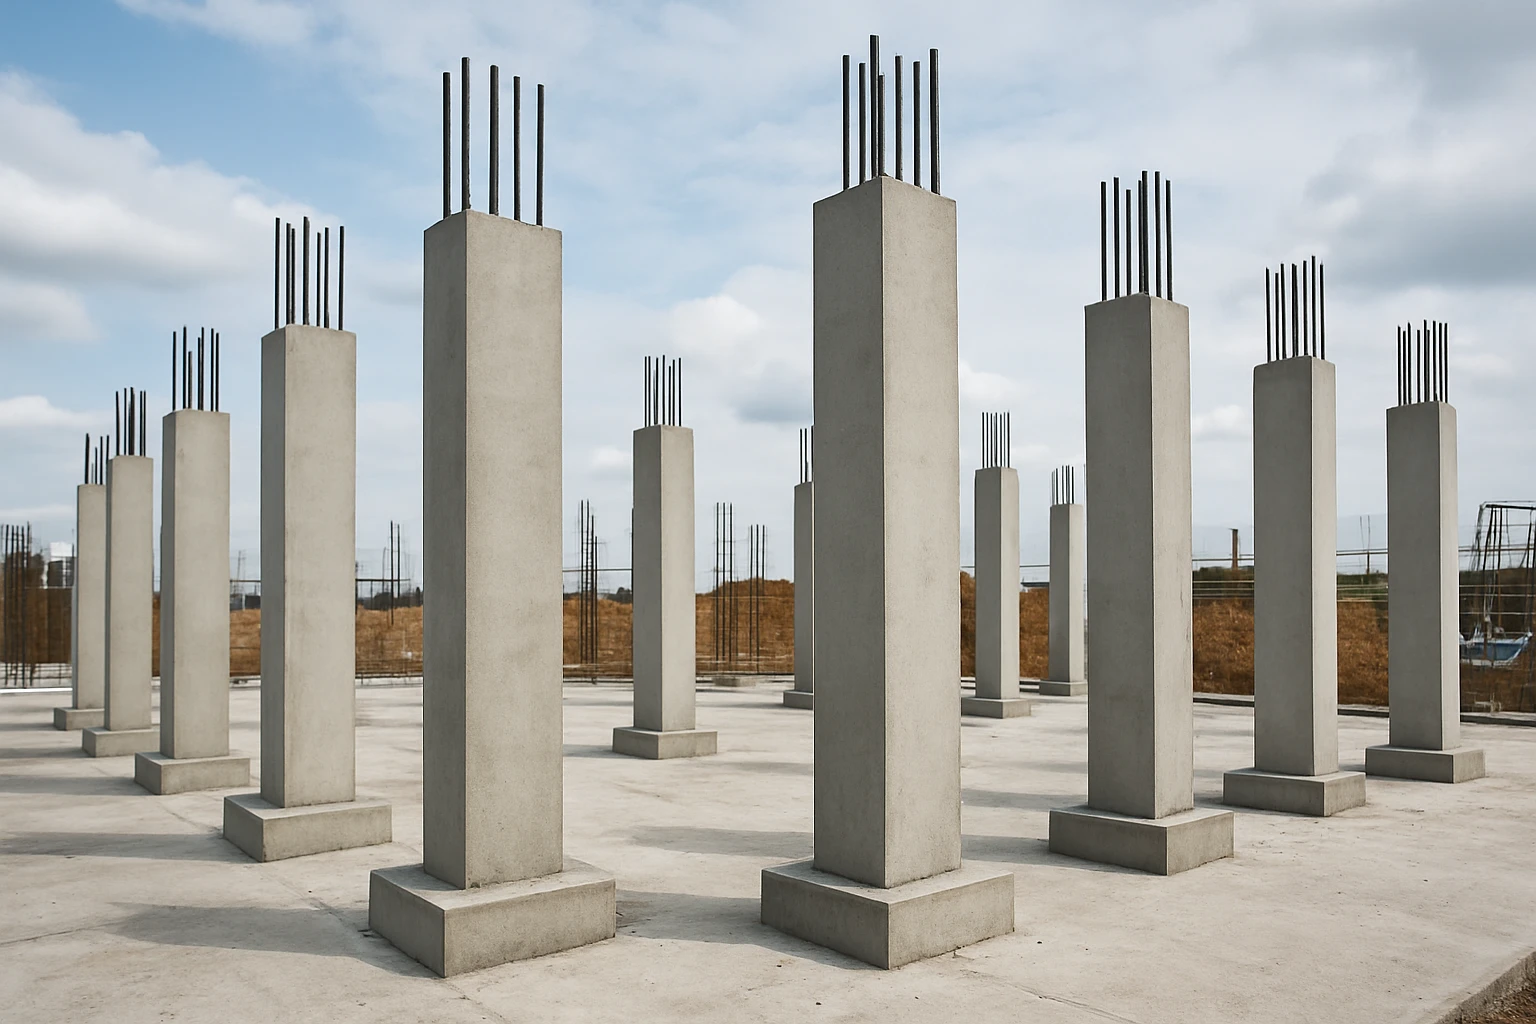
After the style is set, match the construction type to the job itself. Structure, enclosure, and appearance may overlap, but they are not the same thing.
Compare load-bearing, cladding, and decorative-only options
Some precast columns are built to support loads directly. Others are designed as wraps or cladding around steel, wood, or concrete supports. Still others are purely decorative and attach as visual elements without carrying any structural demand. Pick the wrong category and the project can fail on day one.
| Column Type | Primary Purpose | Main Coordination Need |
|---|---|---|
| Load-bearing | Supports beams, roofs, canopies, or upper construction | Engineering review, bearing, anchors, alignment |
| Cladding or wrap | Encloses an existing structural member | Inside clearances, seam layout, attachment method |
| Decorative-only | Provides visual framing or style emphasis | Backing support, fastening, moisture management |
A decorative column should never be assumed to behave like a structural one. Treat that distinction as absolute.
Choose solid, hollow, or segmented units based on transport and install constraints
The right profile on paper still has to fit the truck route, the gate opening, and the staging area. Solid units bring mass and can make sense on some structural work. Hollow pieces reduce weight and can simplify wrapping an inner support. Segmented units help when access is tight or overall height makes delivery awkward.
A rowhouse site in Queens with overhead wires and no crane pad may rule out a large one-piece column immediately. A suburban new build with an open driveway gives you much more freedom. This is why the selected type must account for delivery path, crane access, and site staging space before fabrication starts.
The best column is the one that fits the structure, the truck, and the installation plan.
Decide whether the project needs one-piece columns or stacked components
One-piece columns give you fewer joints and a clean read, which is attractive on exposed entries. Stacked components can be the better answer when height, access, or installation sequence gets complicated. On a hotel canopy, for instance, a segmented assembly may be far easier to lift and align without closing off the whole frontage.
Neither option is automatically better. Judge them by logistics, seam control, and what the finished view will actually show.
Step 3: Measure, layout, and confirm clearances
Layout is where the column stops being an idea and becomes geometry. Precast will tolerate weather. It will not tolerate lazy setout.
Mark centerlines, plumb lines, and base locations
Start with centerlines. Mark the column center at the footing or slab, transfer that line upward, and establish the plumb reference. Standard layout tools are simple: laser level, tape measure, chalk line, framing square, plumb bob, and a reliable spirit level. On a porch rebuild in Suffolk County, a laser across the slab can tell you more in two minutes than twenty minutes of eyeballing.
Make the marks visible and protected. If the crew loses the centerline under dust, traffic, or mortar wash, your chance of a clean set drops fast.
Measure twice before any lift—precast is forgiving in finish, not in geometry.
Confirm top height, base elevation, and capital or trim depth
Height is not just floor to beam. You need finish floor elevation, actual bearing height, any grout pad thickness, shim allowance, base plinth thickness, and the depth of the capital or top trim. This is where a beautiful shop drawing can still go wrong if field conditions drifted after the drawings were approved.
Even small layout errors show up immediately. The eye catches a capital that sits too tight to the beam or a base that looks buried on one side. Check actual field dimensions, not only nominal ones.
Check door swings, porch depth, canopy clearance, and traffic paths
Now test the real-life movement around the column. Will a storm door clear? Does the porch still feel usable? Can a storefront customer push a delivery cart past the base? Does the canopy soffit still have space for lighting, speakers, or signage?
- Door and gate swings
- Walking and service paths
- Guardrail and stair alignment
- Lighting, conduits, and drain lines
- Clear crane and rigging movement on install day
Check those clearances before the truck arrives. Once lifting begins, the cheap fixes are gone.
Step 4: Prepare the foundation and connection points
A column is only as good as the footing and hardware waiting for it. If the base is wrong, the shaft spends the rest of its life trying to hide the problem.
Inspect footings, anchors, embeds, and bearing surfaces
Verify that the footing is stable, properly located, and ready to receive the column. Check anchor bolts, embedded plates, sleeves, dowels, or any other connection detail against the approved drawings. Bearing surfaces should be clean, sound, and flat enough to support the intended seat.
This is not glamorous work, but it is decisive. A shifted anchor pattern or a rough, out-of-level pad can throw off plumb, gap tolerances, and visual alignment all at once.
A perfect column can still fail visually and structurally if the base is wrong.
Plan for shims or grout pads where leveling is required
Shims and grout pads are standard tools for precast installation because few sites are perfect. The point is not to improvise them on delivery day. Decide in advance where leveling will happen, what materials will be used, and how the final bearing surface will be completed.
On a long porch line, a grout pad may help you achieve consistent seating. On a tighter architectural entry, shims may be needed first, followed by a clean grout finish. Either way, make the leveling strategy part of the plan, not a field guess.
Dry-fit hardware and confirm tolerances before delivery day
Before the truck leaves the plant or the crane is booked, test the hardware. Confirm bolt projection, plate spacing, sleeve size, and tolerance at the connection points. If you are covering steel with a hollow or split precast wrap, confirm the internal clearances too.
Coordination with the fabricator matters here. If one dimension has drifted, fix it before transport, not while a crew and a machine sit idle on site.
Step 5: Install and brace the precast column safely

The lift is the most visible moment, but the smart work happens in the minutes just before and just after the piece touches down.
Use the correct lifting gear and rigging for the column weight and shape
Heavy precast pieces typically require mechanical lifting equipment rather than manual handling, and the lifting method has to suit the shape of the unit. Rigging for a smooth square column may differ from rigging for a tall round fluted shaft. Pick points, slings, spreader bars, and tag lines should all match the approved handling approach.
Keep the route clear. One parked van, one low branch, or one unplanned scaffold bay can turn a routine set into a messy one.
Set the column, check plumb, and brace it right away
Once the piece is lowered into place, check bearing, centerline, and plumb immediately. Temporary bracing is commonly used to hold a column plumb during installation, especially before top connections are fully made. Do not wait until the end of the sequence to correct drift.
- Lift and guide the column into position.
- Seat it on the prepared bearing surface.
- Confirm the centerline against layout marks.
- Check plumb in both directions.
- Install temporary bracing.
- Recheck alignment before final connection work.
Never use the final tightening to correct a poor set.
Tighten connections only after the column is fully aligned
Final alignment should be verified before connections are fully secured. Once bolts are tightened or welds are completed, correction becomes slower, more expensive, and far more visible. This matters on both a formal residential porch and a commercial facade where repeated columns need to read as one line from fifty feet away.
If the column is part of a row, step back and sight the whole sequence. One isolated plumb check is not enough when five columns must share the same rhythm.
Step 6: Finish, seal, and detail the column
The structure may be complete at this stage, but the architecture is not. Finishing work decides whether the column looks crafted or merely installed.
Patch joints and blend visible seams
If the unit is segmented or wrapped, treat joints with care. Patch visible seams, blend transitions, and respect the profile lines of the shaft, base, and capital. On a smooth contemporary column, even a small seam can telegraph across the facade. On a fluted classical shaft, a mismatched groove line is just as obvious.
Use repair and patch materials compatible with the finish. Match color and texture deliberately. Rushed seam work is one of the easiest ways to make quality precast look cheap.
The last 10% of detailing often delivers most of the visual impact.
Apply the specified sealer, coating, or protective finish
Precast can be manufactured with a range of surface finishes and architectural detailing, but exterior exposure still matters. Sealers and coatings are commonly used to help protect concrete from moisture and staining. Follow the specification for the actual site condition, whether that means a covered porch, a street-facing storefront, or a freestanding gate feature near deicing salts.
Do not treat sealer like an afterthought. Application timing, surface dryness, and compatibility all matter. If you are coordinating columns with adjacent coping, thin veneer, or decorative stone, keep the finish approach consistent across the visible assembly.
Install bases, capitals, or trim elements that complete the style
This is where the column lands stylistically. Bases and capitals can shift a shaft from plain utility to formal classical expression, while a simple reveal or crisp edge can push the same material toward a modern reading. Make sure trim pieces align cleanly with nearby moldings, soffits, railings, and wall panels.
On many homes and commercial entries, the column does not stand alone. It works with balustrade, stone moldings, wall caps, pier caps, arches, or pavers. When those pieces share proportion and finish, the result feels intentional from the curb.
Common mistakes to avoid with precast Concrete Columns
Most column failures are not dramatic collapses. They are quieter problems: the wrong type ordered, the wrong footing assumed, the wrong crew sequence allowed to stand.
Choosing a look before confirming the load requirement
This is the classic mistake. A homeowner falls for a slim elegant profile, or a designer sketches a decorative shaft, before anyone confirms whether the column needs to carry a porch roof or a transfer beam. A decorative column should not be assumed to perform as a structural column. Once that confusion enters the order, every later decision gets harder.
Start with structure. Then build the look around it. Not the other way around.
The most expensive column mistake is usually made before the order is placed.
Ignoring transport, crane access, or footing limits
A one-piece column may look ideal on paper, but access limitations can decide otherwise. Low wires, narrow drives, soft lawns, tight alleys, or restricted crane setup can all prevent a large precast unit from arriving or being set in one lift. We see this often on infill sites and older neighborhoods where the building fits the lot too tightly.
The footing can be just as limiting. If the support below is undersized or poorly located, no amount of finish work will correct the problem. Logistics are design inputs. Treat them that way.
Skipping coordination with masons, framers, electricians, and finish trades
Columns intersect with roofs, beams, cladding, trim, lighting, and sometimes drainage or signage. Trade coordination matters because a column that sets perfectly can still end up compromised by late conduit runs, misaligned fascia, or a framer who shifts the beam seat without telling anyone.
- Review shop drawings with the framing crew before install.
- Confirm lighting and conduit routes before final finishing.
- Coordinate adjacent masonry, veneer, and trim lines.
- Check roofing, soffit, and flashing transitions at the top connection.
That coordination is what separates a column that merely stands up from one that commands attention for the right reasons.
Strong precast column work starts with the load and the proportions, then wins on precise layout, sound bearing, and disciplined finishing.
Your Concrete Columns should feel like they were always part of the building, whether they read as Doric, transitional, or starkly modern. When you step back to the curb and look at your porch, entry, or storefront, what should those columns say first?
Shape Better Builds With Coral Cast
Coral Cast’s architectural precast concrete manufacturing gives homeowners, builders, architects, contractors, and property owners properly cured, maintenance-free columns and stone shipped nationwide from New York with showroom guidance and free estimates.