

Stone Moldings for Windows and Doors: Finishing Touches That Sell a Home
A mason sets a pale stone frame around a front door, and the whole entry changes in about thirty seconds. The opening looks taller. The siding feels straighter. The house, which looked merely maintained a minute ago, suddenly looks finished, balanced, and worth a second glance.
That is what Stone Moldings do when they are chosen well and installed in the right order. The problem is that many product pages show categories, not the field sequence that keeps a surround crisp, durable, and believable. If you want a window or door opening to read as architecture instead of decoration, you need more than a good profile. You need exact measurement, the right finish for the exposure, a flat substrate, disciplined dry-fitting, and a careful final cleanup.
We use this sequence on small residential entries and on long commercial facades for the same reason: trim only looks expensive when it fits. Follow the steps below, and your openings will look intentional from the curb, from the sidewalk, and from six feet away at the showing.
Prerequisites and tools: choose the right stone before you cut anything
Choose the stone type and trim profile
Start with exposure, not color. Product catalogs show how wide the material range can be, but for exterior openings you need profiles that are built for the application. The same catalog can also show finish options such as polished, honed, tumbled, brushed, split-faced, and textured. That tells you something useful right away — the word “molding” covers everything from delicate interior trim to tougher profiles that belong near weather, splash, or heavy traffic.
Some architectural suppliers also present limestone moldings as liners, baseboards, and moldings, and describe them as suitable for both interior and exterior installation. That makes limestone a real option, but not a free pass. Exterior surrounds still need the right thickness, support, flashing, and joint detailing. Separate thin decorative pieces from profiles meant to frame a true window or door opening.
Rule of thumb: pick the material for the exposure first, and the color for the design second.
| Opening Condition | What You Should Prioritize | Useful Catalog Clue |
|---|---|---|
| Exterior front door or street-facing window | Durability, stable support, weather detailing, and a finish that will age cleanly | Architectural profiles described for interior and exterior use |
| Interior dry opening | Profile character, color match, and surface refinement | Finish listings such as polished, honed, tumbled, brushed, split-faced, and textured |
| Wet-adjacent or high-cleaning area | Cleanable finish, sealant compatibility, and careful transition details | Top category pages sort profiles by location and application |
Gather measuring, cutting, and setting tools
Good trim work is boring in the best possible way. It comes from ordinary tools used carefully. For one opening, I want a 25-foot tape, a 4-foot level, a laser level or straightedge, a framing square, a story pole, painter’s tape, and a sharp pencil. For cutting, bring a wet saw with the right diamond blade, polishing pads or a stone file for easing cut edges, and stable sawhorses. For setting, keep your trowels, spacers, wedges, shims, adhesive, sealant gun, and cleaning rags ready before the first piece comes off the saw.
- Tape measure, laser, 4-foot level, framing square
- Wet saw with stone-rated blade
- Stone file or polishing pads for exposed cuts
- Spacers, wedges, shims, and temporary support blocks
- Adhesive or mortar appropriate to the substrate and exposure
- Sealant, caulk gun, buckets, sponges, and clean microfiber cloths
- Eye protection, hearing protection, gloves, and a respirator for cutting dust
Check the substrate, moisture exposure, and support
Before you approve a profile, inspect what will actually hold it. Is the opening masonry, CMU, cement board, exterior sheathing, or a patchwork of old repairs? A beautiful 6-foot header will not stay straight over rotten backing or a wavy stucco patch. Put a straightedge on the wall. Probe any soft areas. Confirm that the sill pitches correctly and that the opening has room for flashing, backer, adhesive, and the trim thickness without choking the reveal.
If you are matching several openings on one elevation, ask for full-size samples or shop drawings before fabrication. That matters even more when you are using repeated architectural precast profiles from a manufacturer such as Coral Cast, because consistency from one opening to the next is part of what makes the facade feel expensive.
Step 1: Measure the window or door opening and mark the reveal
Measure width, height, and depth at multiple points
Never trust a single width and height. Measure top, middle, and bottom. Then measure left, center, and right. Check depth too. Old houses in Queens, Chicago, or Atlanta can be out of square in ways you do not notice until a rigid stone leg hits the wall. A 1/8-inch taper on each side can turn into a visible miss at the head joint.
Take diagonal measurements if you suspect the opening is racked. If the diagonals are off, decide whether you will split the error, adjust joint widths, or correct the substrate. Stone trim forgives less than wood casing. What looks close enough in framing can look sloppy in limestone.
Mark the reveal line and finished edge
Your reveal is the visible step or offset between the jamb and the face of the molding. Mark it before you cut anything. Use a story pole or set blocks so the reveal stays identical on both legs and across the head. A clean 3/4-inch reveal that stays consistent is far more convincing than a deeper profile with wandering edges.
Snap or pencil the finished edge line as well. That gives you two checks during install: one for where the inner edge lands and one for where the outer frame reads against siding, stucco, brick, or veneer. On painted trim, slight drift can disappear. On pale stone against dark brick, it jumps out immediately.
Account for jambs, casing, and corner returns
Do not measure the opening in isolation. Account for the jamb depth, any existing casing that stays, sill overhang, and whether the molding returns into the wall or dies into another material. A return only 1 inch deep still needs to be measured as its own piece, not guessed at the end of the day.
This is where the top category pages are actually helpful. They organize profiles by placement such as walls and exterior areas, while others group trim by locations like bathroom, kitchen, living room, outdoor, pool, and wall. Those categories remind you that openings live inside systems. A fireplace surround, a front door, and a wall panel edge may all use trim, but their measurement logic and edge conditions are not the same.
Step 2: Select the profile, thickness, and finish that fit the architecture
Match the profile to the home style
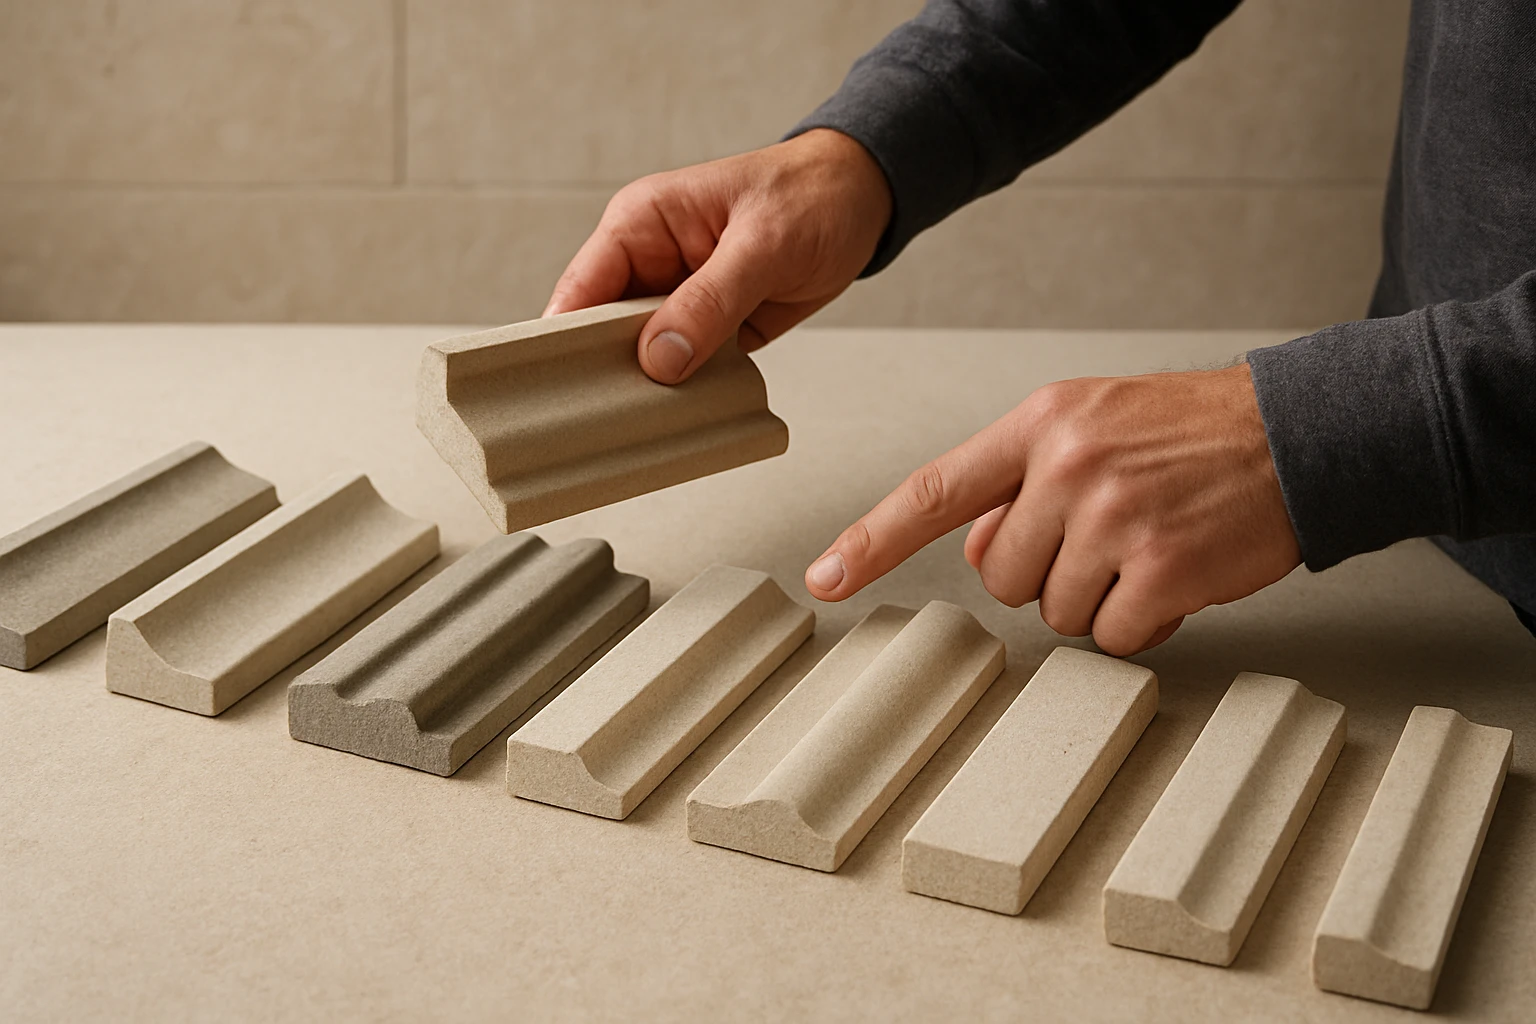
The profile should echo the building, not compete with it. Some architectural suppliers describe limestone moldings as elements that blend with their surroundings and create a natural feel, and that is the right lens to use. A plain brick colonial usually wants cleaner lines than a Mediterranean stucco facade. A modern infill townhouse often looks better with a square-edged band than a deeply carved surround.
| Home Style | Profile Direction | Typical Visual Goal |
|---|---|---|
| Colonial or Georgian | Simple band mold, backband, or restrained header | Crisp symmetry and disciplined shadow lines |
| Mediterranean or traditional masonry | Deeper surround, stool, or modest keystone expression | Depth, warmth, and a stronger frame around the opening |
| Contemporary | Square profile, thinner reveal, minimal joints | Sharp geometry with little visual noise |
If the trim looks too ornate for the facade, it will read as an afterthought instead of an upgrade.
Choose a finish that suits interior or exterior use
Finish changes both performance and mood. Catalogs list polished, honed, tumbled, brushed, split-faced, and textured options. Polished can look formal and clean indoors. Honed is often easier to fit into mixed-material facades because it does not bounce as much light. Textured or split-faced surfaces can work visually on rustic exteriors, but they also trap more dust and adhesive residue during install.
For exterior openings, think about how rain, pollen, and street dirt will sit on the surface. For interiors, think about how fingerprints, cleaning, and nearby flooring will play against the sheen. A front door surround may need a quieter finish than the polished surface inside a powder room two feet away.
Coordinate the molding with nearby stone or veneer
Product catalogs may group moldings across multiple material families, but that mix is useful only as a reference. A trim profile that works beside interior wall tile is not automatically the right move for a full exterior door casing. Thickness, edge detail, and weather exposure decide that.
If your facade already has stone sills, veneer, or coping, pull the molding from that vocabulary. Match undertone before you match color name. If you need ten or twenty identical openings on one building, consistent manufacturing matters as much as color. That is where a supplier with repeatable architectural profiles can save you from the “close, but not quite” problem that shows up when pieces are sourced from three places.
Architectural trim and surrounds are elegant accents for walls. Around windows and doors, they are more than accents. They control the shadow line that makes the opening feel deliberate.
Step 3: Prep the opening and supporting surface
Remove loose material and flatten irregularities
Stone trim lasts when the wall behind it is flat and solid. Scrape loose paint. Knock off mortar fins. Grind proud spots. Fill voids that would leave hollow support under a leg or header. If a 5-foot straightedge rocks on the wall, fix that now rather than trying to bury the error in adhesive.
I like to think of prep as buying forgiveness. Every hump you remove gives you a cleaner joint later. Every void you leave becomes a point where pressure can crack a corner or telegraph a dip through the finished line.
Install waterproofing, flashing, or backing as needed
Some architectural precast and stone-look products are durable for interior and exterior installation. Durable does not mean waterproof by itself. Exterior openings still need sound flashing logic. Make sure head flashing, sill protection, and side transitions shed water away from the wall assembly. If the opening sits in a cladding system, follow the drainage plane instead of trapping moisture behind a nice-looking surround.
On framed walls, confirm that your backer is rated for the exposure and firmly fastened. On masonry, look for crumbling joints or a slick painted face that needs mechanical preparation. The trim may be decorative, but the support conditions are not.
Plan for drainage, expansion, and movement joints
Stone, mortar, sealant, framing, and masonry all move differently. Exterior and commercial-space applications are a clue that these moldings are expected to do more than sit pretty inside a dry living room. You need a plan for drainage at horizontal surfaces, movement at perimeter transitions, and sealant where dissimilar materials meet.
Don’t start with adhesive until the substrate is flat, dry, and structurally ready.
A tight miter over an active crack is still a bad joint. A perfect reveal over a wet sill is still a future stain. Prep is where the job either starts behaving like architecture or starts counting down to a callback.
Step 4: Dry-fit, cut, and join the pieces before setting them
Lay out every piece in order
Put all legs, heads, sills, and returns on sawhorses in installation order. Dry-fit them at the opening if possible. If not, build the geometry on the ground and verify against your marks. This is where you catch a header that needs another 1/16 inch, a return that flips left to right, or a color variation that should be balanced across the facade.
Manufactured concrete products especially can shift in tone from piece to piece. Even within one batch, one leg may run warmer than the other. Pairing and sequencing before setting prevents a “good piece, bad layout” result.
Make clean miters, returns, and edge cuts
Product lineups often break trim into small categories. That range matters because different profiles cut and join differently. A simple flat band can accept a crisp butt joint or a miter depending on the design. A more articulated profile needs cleaner transitions or the shadow line collapses at the corner.
Use a sharp, appropriate blade and support the piece well during the cut. Then ease the exposed edge lightly so it does not look factory-sharp on one side and chipped on the other. If you are making returns, dry-assemble the corner with tape before you commit to adhesive.
Label pieces so the final install stays organized
Number every piece. Write “L1,” “R1,” “H,” and mark the top edge or room side with painter’s tape or chalk. This sounds basic because it is basic, and it saves jobs. Once mortar, spacers, and a second installer enter the scene, an unlabeled stack of nearly identical concrete becomes a gamble.
Cut once only after the dry-fit proves the corner geometry works.
One of the most expensive mistakes on custom trim is recutting after half the assembly is already set. By then, you are no longer solving geometry. You are chasing it.
Step 5: Set, anchor, and align the molding around the opening
Apply adhesive and fasteners according to weight and exposure
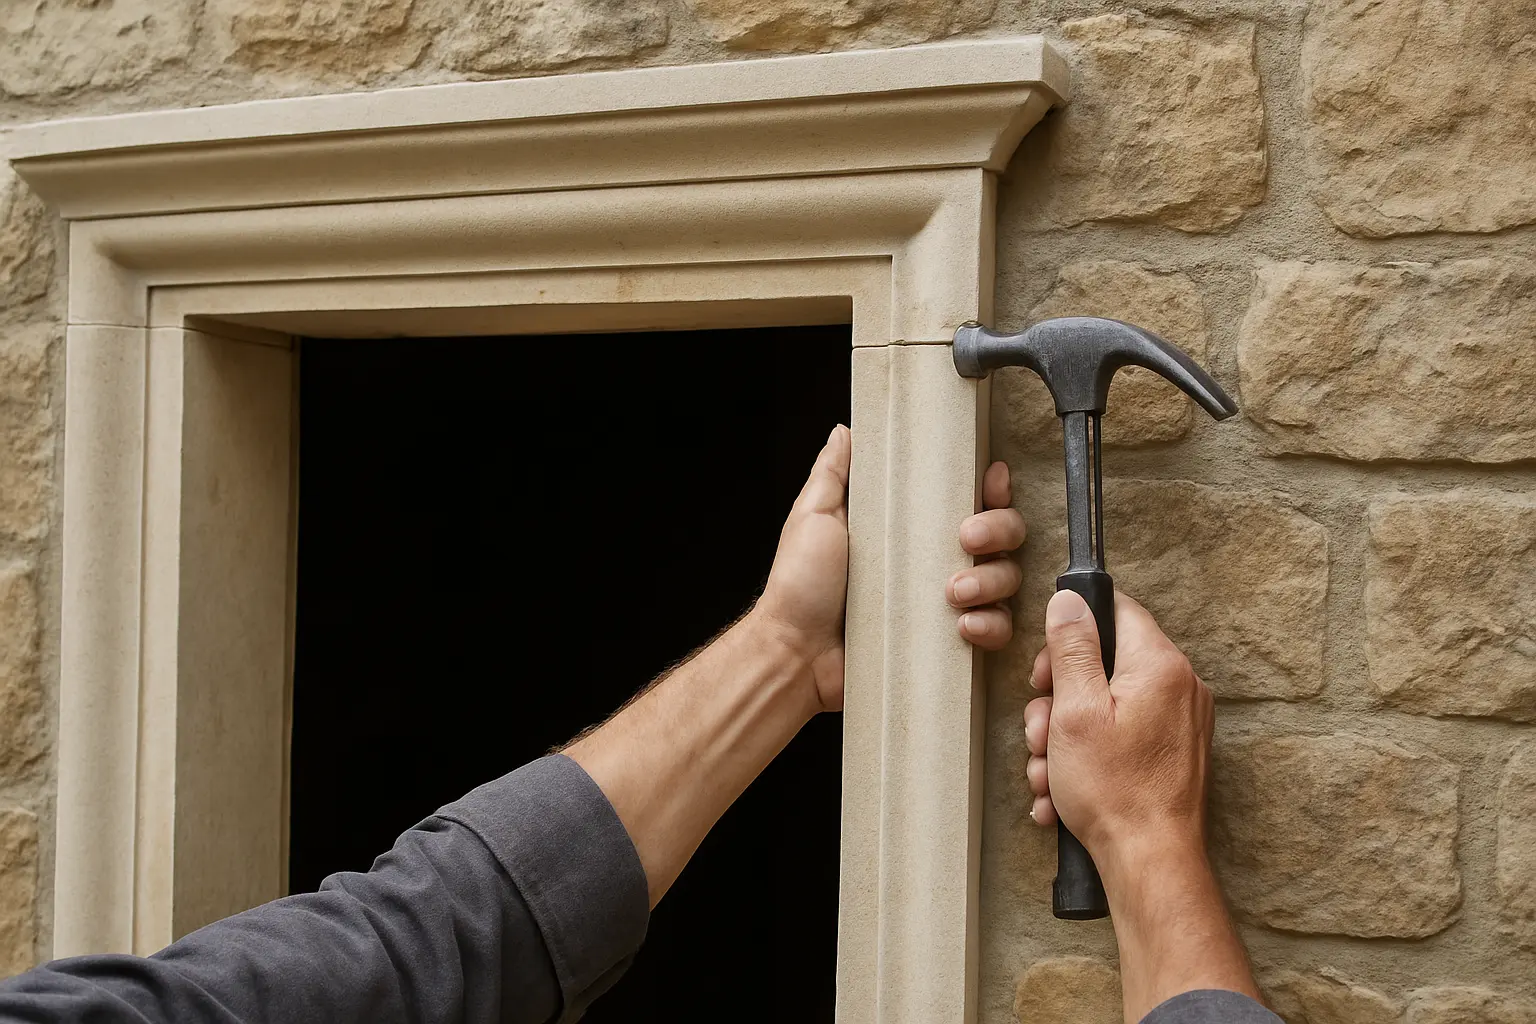
Now you can set. Choose the bond method based on piece weight, substrate, and exposure. Small interior pieces may rely on adhesive alone. Larger exterior headers, deep sills, or heavy precast elements may need mechanical anchoring, temporary support, or engineer-reviewed details. Follow the supplier’s recommendations and the wall assembly requirements rather than assuming one setting method covers every opening.
Back-butter pieces when needed so you get full contact instead of random voids. Start where the layout gives you the best control — often the sill or one leg — then build to the head with constant checks.
Keep joints consistent and check plumb as you go
This is a control job. Set a piece, check it, and then set the next. Use wedges and spacers so the joint width stays steady. Check plumb on both legs and level on the head. A line that drifts only 1/16 inch per piece becomes obvious by the time you span a 6-foot opening.
A molding can be beautiful and still fail if the line drifts out of level by the last course.
Stand back often. I like to check from 3 feet away, then from the curb if the facade is street-facing. What reads straight under your hands can read crooked across the yard.
Confirm sightlines from the curb and from inside
Category pages show profiles used in commercial spaces and exterior settings for a reason: these pieces are visual frames, not just edge guards. From outside, the surround should sharpen the opening and balance with nearby windows. From inside, it should not create awkward overhangs, pinched jamb lines, or strange transitions at the stool or casing.
If the building has repeated openings, compare the reveal and head height with the next bay before the adhesive cures. One door surround that sits 1/4 inch proud of the rest will announce itself every time someone looks up the elevation.
Step 6: Seal, caulk, and inspect the finished details
Seal joints and clean excess material carefully
Final finishing is where a good install becomes a convincing one. Product pages emphasize profiles for walls, exteriors, and other settings. That is a reminder that residue left today can become staining, trapped moisture, or visible haze tomorrow. Tool sealant joints neatly where dissimilar materials meet, and remove smears before they cure.
Match your cleanup method to the surface. The finishes shown on category pages — polished, honed, tumbled, brushed, split-faced, and textured — do not all tolerate the same treatment. A polished face can scratch. A textured face can hold mortar in every low spot. Start mild, test in an inconspicuous area, and work patiently.
Inspect corners, returns, and transitions after cure
Do not judge the job while everything is still wet. Come back after cure and inspect every outside corner, every return, and every transition to brick, stucco, siding, or interior wall finish. Look for hairline gaps, corner chips, proud edges, and sealant that has pulled away.
Check the shadow lines at different times of day if the opening gets hard sun. Early light and raking light are brutal, and that is useful. They reveal whether the frame reads as one clean system or as a handful of parts that happen to touch.
Touch up any haze, chips, or uneven joints
Do the small corrections while the job is still fresh. Ease a sharp edge. Replace a bad return if you have to. Touch up minor chips only with methods approved for the material and finish. If a joint stands out, ask why before you hide it. Was the piece cut wrong, or is the substrate telegraphing through?
Use the gentlest cleaning method that still removes residue; aggressive cleanup can damage the finish.
That last 5 percent matters. Buyers rarely say, “I love the miters.” They just feel that the house looks finished.
Common mistakes: what makes Stone Moldings look amateur
Ignoring movement and moisture at exterior openings
Most failures I see start here. The top pages sort profiles by location and application, and that is your clue that exposure matters. Exterior doors and windows move. They get wet. They bake in sun. If you bridge active joints, block drainage, or skip sealant transitions, the trim may still look fine on day one — then crack, stain, or debond later.
The material is not always the problem. Some architectural products are sold for both interior and exterior use. The mistake is treating the opening like a picture frame instead of part of a weather-exposed wall assembly.
Choosing the wrong finish for the location
A finish that looks gorgeous on a sample board can behave badly in place. Highly reflective surfaces show lippage and residue fast. Split-faced and heavily textured finishes can trap grime near a handle side or below a sill. Soft visual choices sometimes create hard maintenance problems.
The search results repeatedly sort trim by finish and location for a reason. Wall, outdoor, commercial, and exterior settings each stress the surface differently. Pick the finish for the life it will live, not just for the showroom lighting it looked good under.
Skipping dry-fit and rushing the corners
Nothing makes trim look cheaper faster than bad corners. A rushed miter, an unplanned return, or a header that lands with unequal legs tells on the whole job. People may not know why it looks off, but they know it does.
The fastest way to make trim look cheap is to treat it like a generic accessory instead of an architectural detail.
Dry-fitting feels slow until you compare it with a remake. When a surround goes wrong, it rarely goes wrong because the piece was inherently flawed. It goes wrong because the sequence got skipped — planning, prep, or finish selection.
Stone Moldings sell the finish when you follow the sequence: measure, match, prep, dry-fit, set, seal, and inspect.
Do that, and a door or window stops looking like a punched hole in a wall and starts reading like part of the architecture. Buyers may never name the detail, but they feel it the moment they walk up.
When you study your next opening, what one change would make it feel complete rather than merely installed?
Elevate Openings With Coral Cast
Coral Cast offers architectural precast concrete products made in New York, with free estimates, showroom guidance, custom matching support, and secure nationwide shipping.